How to Fix a Hacked WordPress Website August 2025
Has Your WordPress Website Been Hacked? Here’s How to Take Back Control
Imagine waking up one day and discovering that your WordPress website – the online hub you’ve spent countless hours building—has been hacked. It’s a nightmare scenario for any website owner, whether you’re running a small blog or a large-scale e-commerce site. Websites get hacked for a variety of reasons, from vulnerabilities in plugins to weak passwords, and the aftermath can be devastating. However, you don’t have to feel helpless. In this guide, we’ll cover everything you need to know to fix a hacked WordPress website, regain control, and prevent future incidents.
Let’s face it—WordPress is a prime target for hackers due to its popularity. But with the right tools and services at your disposal, you can resolve the issue and secure your site in no time. Whether you’re a website owner trying to salvage your business or a developer looking to clean up a client’s site, this guide will offer detailed, step-by-step solutions.
Why WordPress Sites Get Hacked
WordPress powers over 40% of the internet, making it one of the most popular content management systems in the world. With popularity comes risk. Hackers target WordPress websites for several reasons, most commonly due to vulnerabilities in plugins, themes, or core files.
Common Reasons for Hacks:
1. Outdated Software
One of the most common reasons WordPress sites are hacked is that they are not running the latest version of WordPress core, themes, or plugins. Every new update typically includes important security patches that address vulnerabilities discovered in previous versions. Failing to update your WordPress installation can leave your site exposed to known exploits that hackers are actively searching for.
Weak Passwords
Using weak or easily guessable passwords for your WordPress admin, hosting account, or even database can open the door to hackers. Many attacks, especially brute-force attacks, are based on repeatedly trying to guess a user’s password until they gain access. If your password is simple, like “password123” or “admin,” you’re making it easier for them.
Vulnerable Plugins and Themes
Plugins and themes are what make WordPress highly customizable and versatile, but they can also introduce serious security risks. Many third-party plugins and themes are not regularly updated or maintained, which means they can develop vulnerabilities over time. Hackers target these insecure plugins and themes to inject malicious code or gain unauthorized access.
Insecure Web Hosting
Choosing a low-quality or insecure web hosting provider can put your site at risk. Some hosting environments are not properly secured, lacking important safeguards like firewalls, malware scanning, and DDoS protection. Additionally, shared Faster Hosting environments can be problematic because if one site on the server gets hacked, other sites may be affected as well.
No SSL Certificate
An SSL certificate encrypts the data transmitted between a user’s browser and the website. Without SSL, sensitive information like login credentials and personal details can be intercepted by hackers. SSL is also a ranking factor for Google, and having one provides your site with additional trust and security.
Poor File Permissions
File permissions control who can read, write, or execute files on your server. Incorrect file permissions can allow hackers to modify important files or upload malicious code to your site. Ensuring that your file and folder permissions are set correctly (for example, wp-config.php should not be writable) is essential to avoid exploitation.
Lack of Security Plugins
Many website owners fail to install proper security plugins on their WordPress sites. These plugins, like WordFence, Sucuri, and iThemes Security, provide essential protection, such as blocking malicious IP addresses, scanning for malware, and preventing brute-force attacks. Without them, you’re leaving your site more vulnerable.
Unprotected wp-admin Directory
The wp-admin directory is where the WordPress admin panel is housed, and if it’s left unprotected, it can be an easy entry point for hackers. Many site owners fail to take steps like password-protecting the wp-admin directory or limiting access to it by IP addresses, which could otherwise prevent unauthorized login attempts.
Why WordPress Sites Get Hacked
Malware from External Sources
Sometimes, WordPress sites get hacked through malware installed on a user’s computer. If a website admin’s device is infected with malware, it could send login credentials or other sensitive data directly to hackers. Ensuring your personal device is secure with antivirus software is another important step in protecting your WordPress site.
Using “Admin” as Username
One of the first things hackers try when attacking a WordPress site is logging in with the default “admin” username. If you’re still using “admin” as your primary username, you’re making it much easier for attackers to guess the password, especially during brute-force attacks.
Poor Database Security
WordPress uses a MySQL database to store all of your website’s data. Poor database security practices, such as using a weak database password, keeping the default database prefix (wp_), or allowing database access from remote IPs, can increase the likelihood of your website being hacked.
No Backup Strategy
Even the most secure websites can sometimes be compromised. Without a proper backup strategy, recovering from a hack can be time-consuming and costly. Many WordPress site owners neglect to set up automated, frequent backups, leaving them vulnerable to data loss and prolonged downtime after an attack.
Understanding why your WordPress website might be targeted is the first step in defending against attacks. However, if you’re reading this, chances are it’s too late for prevention, and you need to fix the hack. Let’s dive into the actual process of cleaning and securing your site.
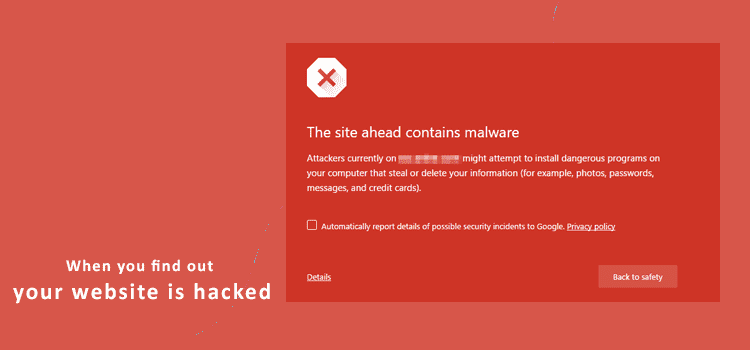
When you find out your website is hacked
Step 1: Detecting the Hack
Detecting a hack is the first critical step in recovering your WordPress site. Hackers can compromise your site in various ways, sometimes with subtle changes that may not be immediately noticeable. Understanding the signs and symptoms of a hacked WordPress site is essential to swiftly identify the issue and prevent further damage.
Signs Your WordPress Site Has Been Hacked
Unusual Activity on Your Website
The most apparent sign that your WordPress site may have been hacked is if it starts behaving abnormally. For example, if your site’s layout changes unexpectedly, or your homepage gets replaced with strange content, you should suspect a hack.
Website Defacement
Hackers often leave their mark by defacing websites, which can include adding inappropriate content, offensive images, or unrelated text. If your site no longer resembles what it should, it’s a clear sign of a breach.
Login Issues
If you find yourself locked out of your WordPress admin panel, this could be a strong indicator that someone has taken over your site and changed login credentials. If your usual username and password are no longer valid, a hacker may have infiltrated your admin area.
Unfamiliar User Accounts
A less obvious sign of a hack is the appearance of new user accounts—especially those with admin privileges that you didn’t create. If you see unfamiliar users in your Users section of the WordPress dashboard, they could be a backdoor for hackers to re-enter your site even after cleanup.
Strange File or Directory Changes
A subtle yet critical sign of a hack is unfamiliar files or folders within your website’s file directory. Hackers often upload malicious files and scripts to infect your site or create a backdoor for future access.
Using an FTP client, check for suspicious files in your WordPress directories. Look out for files with strange names or locations you don’t recognize, especially in wp-content, wp-includes, or your theme’s directories.
Slow Website Performance
If your WordPress site suddenly becomes sluggish, crashes frequently, or experiences downtime, this could indicate that malicious scripts or malware are running in the background, consuming server resources.
Hacks like Distributed Denial of Service (DDoS) attacks can also slow down your website significantly by overwhelming it with traffic.
Spammy Content or Links
Hackers may inject spammy links or content into your website, which can appear in unexpected places such as blog posts, pages, or widgets. These links usually lead to phishing sites or promote illegal activities.
Sometimes, spam content is hidden from users but is visible to search engines, which can severely affect your SEO rankings. It’s important to regularly inspect your site for such hidden content.
Warnings from Search Engines or Browsers
If Google or another search engine flags your site for hosting malware or phishing content, they will usually show a warning message when users try to visit your site. These warnings could be found in Google Search Console or presented to visitors directly through their browsers.
Antivirus or Security Plugin Alerts
If you have a security plugin like WordFence, Sucuri, or MalCare installed, they may notify you of suspicious activity or malware on your site. These tools scan your WordPress files for changes, vulnerabilities, and malicious scripts.
Your hosting provider may also alert you if they detect malicious activity coming from your site.
Unexplained Increase in Bandwidth or Server Resource Usage
A sudden spike in server usage or bandwidth could suggest that your site is being used to host malicious content, send spam emails, or act as part of a botnet. Hackers often hijack servers to run resource-intensive processes, which can overload your hosting resources.
Tools to Detect a Hacked WordPress Site
There are several security tools available to help you scan your WordPress site for malware and other malicious activity. These tools can perform comprehensive scans and alert you to infected files, vulnerabilities, or unauthorized changes.
WordFence Security
WordFence is one of the most popular WordPress security plugins. It includes a firewall, real-time traffic monitoring, and a malware scanner. It can detect changes in core files, plugin vulnerabilities, and suspicious IP addresses. The malware scanner compares your site’s files with the official WordPress repository, helping identify any malicious changes.
Sucuri Security
Sucuri offers a powerful website monitoring and malware removal service. It provides website scanning tools to detect malware, out-of-date software, and blacklisted status. Sucuri also offers integrity checks for core files and a file integrity monitoring system to identify modifications in real-time.
MalCare
MalCare is a dedicated WordPress security plugin that uses advanced algorithms to detect malware and other security issues. It scans your site for hidden malware and backdoors that are difficult to detect using standard tools. The plugin is known for not affecting website performance, making it a preferred choice for larger sites.
Google Search Console
If your website is infected with malware or is involved in phishing, Google will often flag it in Google Search Console. Under the Security Issues section, you’ll be alerted if your site has been hacked or if there’s malicious activity detected. Google may even remove your site from search results if it poses a danger to users.
SiteCheck by Sucuri
Sucuri offers a free SiteCheck tool that allows you to scan your website from their server. The tool scans for malware, defacements, and spam injections by crawling your site and looking for anomalies.
Manual Checks for Hacked Files
In addition to using automated tools, you can also manually check your website for signs of hacking. Below are some manual inspection methods you can use:
Check for Unauthorized File Changes
Inspect your WordPress directories for any new or modified files. You can use FTP/SFTP to compare the timestamps of your WordPress core files with a clean installation of WordPress. Malicious files often have recent modification dates or file names that seem random.
Examine the wp-config.php File
The wp-config.php file is crucial to your site’s functionality. Hackers often target this file to insert malicious code that creates backdoors or steals sensitive information. Open this file and look for any unusual code, particularly at the top or bottom of the file.
Audit the .htaccess File
The .htaccess file controls how your server processes certain requests. Hackers may modify this file to create redirects, block search engines, or hide malicious scripts. Check your .htaccess file for unfamiliar redirects or code snippets.
Review Database Entries
Hackers can inject malicious code or links directly into your WordPress database. Use tools like phpMyAdmin to inspect the database for unusual content in your posts, comments, or user tables. Pay close attention to the wp_users and wp_options tables for suspicious entries.
Next Steps: Cleaning the Hack
Once you’ve identified that your site has been hacked, the next step is to clean up the infection. This involves removing the malicious files, restoring your site from a clean backup if necessary, and securing it against future attacks.
Detecting a hack quickly can minimize damage to your site, help you regain control faster, and protect your visitors from further harm. After confirming the hack, follow the steps outlined to clean up and secure your WordPress site.
Let’s start backing up your website
Step 2: Back Up Your Website
Before diving into the process of cleaning up your hacked WordPress site, it’s crucial to take a complete backup. This step ensures you have a safety net, allowing you to restore your website if something goes wrong during the repair process. It also helps you preserve any valuable data that might still be intact on your hacked site.
Taking a backup of your hacked WordPress website might seem counterintuitive, but it’s essential to capture the current state of your site, including infected files, as this can provide insight into what went wrong and help you retrace your steps later if needed.
Why Backing Up a Hacked Website Is Important
Prevent Data Loss
Attempting to clean a hacked site can sometimes lead to the accidental deletion of essential files or content. By backing up your site, you ensure that no critical information is permanently lost, and you can recover files if you make an error during cleanup.
Analyze the Hack
Having a backup of your hacked website allows security professionals or tools to analyze the extent of the damage. In many cases, identifying the origin of the hack or specific malware injected into the site can be invaluable for both removing the infection and preventing future attacks.
Restoration Option
If the damage to your site is extensive, cleaning it manually might not be feasible. A backup gives you the option to restore your site to its previous state once you’ve removed the infected files. This is particularly helpful if you plan to revert to a known, uninfected version of your website.
How to Back Up a Hacked WordPress Website
There are several ways to back up a WordPress website, and the method you choose depends on whether you still have access to your WordPress admin dashboard and your hosting provider.
1. Manual Backup via FTP/SFTP
Backing up your website manually using FTP or SFTP is the most direct method, particularly if you’ve lost access to your WordPress dashboard. This method allows you to download your website’s files directly to your computer for safekeeping.
Here’s how to back up your site manually:
Step 1: Connect to Your Server via FTP/SFTP
Use an FTP client such as FileZilla, Cyberduck, or WinSCP to connect to your server. You will need your FTP credentials, which are typically provided by your hosting provider.
Step 2: Download All Files
Once connected, navigate to your website’s root directory (usually called public_html or www). From there, download all the files and folders to your local computer, including:
- wp-admin
- wp-content
- wp-includes
- Other site files such as .htaccess, wp-config.php, and robots.txt
Step 3: Export Your Database
WordPress uses a MySQL database to store content, user information, and other data. To back up your database, log into phpMyAdmin (usually found in your hosting control panel) and select your WordPress database.
Click the Export tab and choose the “Quick” export method for simplicity. This will download a .sql file containing your entire database.
Once you have both your site files and database backed up, store them in a secure location (preferably both locally and in a cloud storage service such as Google Drive, Dropbox, or Amazon S3) for future use.
2. Backup Using a Plugin
If you still have access to your WordPress dashboard, using a backup plugin can simplify the process and provide additional security options such as automated backups and cloud storage integration.
Here are some reliable WordPress backup plugins:
UpdraftPlus
UpdraftPlus is one of the most popular and user-friendly backup plugins for WordPress. It allows you to create a complete backup of your website (including files and databases) with a single click and can automatically store backups in cloud services like Google Drive, Dropbox, or Amazon S3.
BackupBuddy
Another comprehensive solution, BackupBuddy allows you to schedule automatic backups, store backups remotely, and restore your site from a backup in just a few clicks.
Duplicator
Primarily used for site migration, Duplicator also serves as a solid backup solution. It creates complete site backups, including your database, and packages them into a single zip file.
Steps to Back Up Using a Plugin:
Step 1: Install the Plugin
From your WordPress dashboard, navigate to Plugins > Add New, and search for your preferred backup plugin (e.g., UpdraftPlus). Install and activate the plugin.
Step 2: Create a Backup
Once the plugin is activated, go to the plugin’s settings (usually under Settings > UpdraftPlus Backups) and initiate a manual backup. Ensure you select both files and database for a complete backup.
Step 3: Store Backup in a Secure Location
Most backup plugins offer the option to store backups in the cloud or download them locally. Use both methods to ensure you have multiple copies of your backup stored in different locations.
3. Backup via Hosting Control Panel
Many hosting providers offer built-in backup tools in their control panel, allowing you to create and download backups without the need for plugins or FTP access.
Step 1: Log in to Your Hosting Control Panel
Access your hosting control panel (e.g., cPanel, Plesk, or another proprietary dashboard) and look for the backup feature.
Step 2: Use the Backup Tool
Most control panels provide a backup wizard or an option labeled “Backup” under Files. Use this tool to generate a backup of your home directory (files) and MySQL database.
Step 3: Download the Backup
After the backup is generated, download it to your local computer. Some hosting providers also allow you to schedule automatic backups directly from the control panel.
Best Practices for Website Backups
Store Backups Offsite
Keeping backups on your web server is risky because if the server gets compromised, your backups could be infected as well. Always store backups offsite—either on your local computer or in the cloud.
Create Regular Backups
After fixing your hacked website, make sure to schedule regular backups. How often you back up your site will depend on how frequently your content changes. For high-traffic sites or e-commerce stores, daily backups are recommended. For smaller blogs or informational websites, weekly backups might suffice.
Test Your Backups
A backup is only useful if it works. Make sure to test your backups periodically by restoring them to a staging or local environment to ensure they are complete and functional.
Use Multiple Backup Methods
Relying on just one method of backup can be risky. Use a combination of plugin-based backups, manual backups, and hosting provider backups to ensure redundancy in case one method fails.
What to Do After Backing Up Your Website
Once you’ve safely backed up your hacked WordPress website, you can move on to the next step of cleaning up the hack. Having a backup ensures that if something goes wrong during the cleanup process, you can restore your site to its current state and try again.
Backing up is not just a precautionary step in the cleanup process, but an essential part of your website security strategy going forward. After your site is back up and running, be sure to regularly back up your WordPress site to minimize the damage from any future attacks.
Step 3: Take Your Website Offline
Taking your WordPress website offline after discovering a hack is a critical step to prevent further damage and protect both your visitors and your website from ongoing malicious activity. While it might seem counterproductive to disable your website, it’s essential to block access temporarily while you work on cleaning up the hack and securing your site.
By taking your site offline, you can minimize risks such as:
- Spreading malware to visitors
- Allowing hackers to do more damage
- Losing SEO rankings due to malicious content being indexed
The goal is to put your website in maintenance mode or make it completely inaccessible to anyone but yourself until you’ve finished the necessary fixes.
Why You Should Take Your Website Offline
Limit Further Exploitation
Hackers often leave backdoors, which allow them to access your site again, even after you remove malicious files. By taking your site offline, you can stop further exploitation while you remove these vulnerabilities.
Protect Visitors
Many hacks involve injecting malicious code or links that could infect your visitors’ devices. If your website is still live and accessible during the cleanup process, you risk spreading malware to anyone who visits your site. By going offline, you ensure that your visitors remain protected while you resolve the issue.
Prevent SEO Damage
If search engines crawl your hacked site and detect malicious content, such as spam links or malware, they may blacklist your site or flag it as dangerous, leading to a significant drop in SEO rankings. Taking the site offline ensures that no harmful content gets indexed during the cleanup process.
Avoid Further Data Loss
Hackers often make changes to databases, files, or content while a site remains compromised. Going offline prevents unauthorized actions from continuing, preserving as much data as possible.
How to Take Your WordPress Website Offline
There are several methods to temporarily take your WordPress site offline, ranging from displaying a maintenance mode message to fully restricting access using server configurations.
1. Put Your Website in Maintenance Mode Using a Plugin
One of the easiest and most popular ways to take your site offline is to use a maintenance mode plugin. This method allows you to display a custom message to visitors while restricting access to your website’s content. Meanwhile, you can still access the backend and make repairs.
Some of the most popular maintenance mode plugins for WordPress include:
WP Maintenance Mode & Coming Soon
A simple and effective plugin that lets you put your site in maintenance mode with just a few clicks. You can create a custom maintenance message, add a countdown timer, or restrict access by IP address.
SeedProd Maintenance Mode
SeedProd offers an intuitive maintenance mode feature that’s easy to set up. It allows you to customize the page design and text visitors see when your site is down. You can even integrate it with email marketing services to notify visitors when your site is back online.
Steps to Use a Maintenance Mode Plugin:
Step 1: Install and Activate the Plugin
From your WordPress dashboard, navigate to Plugins > Add New and search for “WP Maintenance Mode” or “SeedProd.” Install and activate the plugin.
Step 2: Configure Maintenance Mode
Once the plugin is activated, go to the plugin’s settings page and enable maintenance mode. You can customize the message displayed to visitors or choose a pre-built template.
Step 3: Enable Maintenance Mode
Toggle the maintenance mode feature on, and your site will be inaccessible to regular visitors while displaying the maintenance message. You, as the admin, will still be able to access the backend for cleanup.
2. Restrict Access Using .htaccess or Server Configurations
If you prefer a more secure and comprehensive way to take your site offline, you can use server-level configurations via your .htaccess file (if your server runs Apache) or Nginx config file (for Nginx servers). This method allows you to restrict access to everyone except specific IP addresses (such as your own), effectively locking out all other visitors.
Steps to Take Your Site Offline Using .htaccess:
Step 1: Access Your Website via FTP/SFTP
Use an FTP client (like FileZilla or Cyberduck) to connect to your website’s server. Navigate to the root directory of your WordPress installation, where the .htaccess file is located.
Step 2: Edit the .htaccess File
Open the .htaccess file and add the following code to block all traffic except for your IP address:
# Allow access to specific IP
 <RequireAny>
 Require ip YOUR_IP_ADDRESS
 </RequireAny>
# Deny access to all other visitors
<RequireAll>
Require all denied
</RequireAll>
Replace YOUR_IP_ADDRESS with your actual IP address. You can find your public IP address by visiting websites like whatismyip.com.
Step 3: Save and Upload the File
Save the changes and upload the updated .htaccess file back to the server. Your site will now be inaccessible to all visitors except for those with the IP address specified.
3. Use a Temporary URL Block via Hosting Control Panel
If you have access to your hosting provider’s control panel (such as cPanel or Plesk), some hosting providers offer tools to temporarily disable your website or redirect all visitors to a “down for maintenance” page.
Steps for cPanel Users:
Step 1: Log into cPanel
Access your hosting provider’s cPanel dashboard.
Step 2: Use the Temporary URL Block
In the Domains section, locate the Redirects tool. Here, you can set up a temporary redirect for all traffic to a simple maintenance page or another safe location.
Step 3: Save Changes
Once you configure the redirect, save the settings. All visitors will be directed to the new URL, while you can continue working on the backend.
4. Disable Site Using a Staging Environment
Some hosting providers offer the option to create a staging environment, which allows you to duplicate your live site for testing and development purposes. You can work on cleaning your site in the staging environment, while the live site remains offline or in maintenance mode.
Steps to Use a Staging Environment:
Step 1: Log into Your Hosting Account
Access your hosting provider’s dashboard (e.g., SiteGround, Bluehost, or WP Engine), and look for the staging environment feature.
Step 2: Create a Staging Copy
Use the hosting control panel to create a staging copy of your website. This will duplicate your entire site in a separate environment.
Step 3: Put the Live Site in Maintenance Mode
Once the staging copy is ready, put the live site in maintenance mode (using one of the methods above) and start fixing the issues on the staging version.
Step 4: Push the Changes Live
After cleaning and securing the staging version, push the changes to your live site.
Best Practices for Taking Your Website Offline
Create a Clear Maintenance Message
If you’re using maintenance mode, make sure to display a professional message to your visitors. Let them know that your site is temporarily down for maintenance and will be back online shortly. If possible, provide a timeline for when they can expect your site to be restored.
Monitor Access Logs
While your site is offline, keep an eye on your server’s access logs to identify any further suspicious activity. Monitoring these logs can help you see if hackers are attempting to re-enter your site or if they’re using known backdoors.
Work Quickly to Minimize Downtime
While it’s important to thoroughly clean your site, prolonged downtime can hurt your SEO and frustrate your visitors. Work efficiently to ensure your site is back up and running as soon as possible, with all security measures in place.
Taking your WordPress website offline is a crucial step in the process of cleaning up a hack. It ensures that you can work on your site without interference from hackers or visitors accessing malicious content. Whether you use a maintenance mode plugin, server configuration changes, or your hosting provider’s tools, the key is to restrict access temporarily while keeping your site secure during the recovery process.
Once your site is safely offline, you can move on to the next step: cleaning up the hack and removing malicious code from your WordPress installation.
Step 4: Clean Up the Hack
Once you’ve taken your WordPress website offline and secured a backup, it’s time to dive into the most crucial part of the recovery process: cleaning up the hack. Cleaning your website involves removing any malicious code, infected files, and backdoors left by hackers that they might use to regain access to your site. This step is vital to ensure your website is fully restored and secure.
A systematic approach to cleaning your WordPress site will help ensure that every trace of the hack is eliminated and prevent future compromises.
Key Steps to Clean Up a Hacked WordPress Website
- Delete Suspicious Users
- Scan and Remove Malware
- Check and Replace Core WordPress Files
- Remove Malicious Code from Theme and Plugin Files
- Inspect the Database for Malicious Content
- Check for Backdoors
- Remove Vulnerable Plugins and Themes
Let’s break down each step in detail to ensure a thorough cleanup.
1. Delete Suspicious Users
Hackers often create new admin-level user accounts to maintain access to your site even after the initial vulnerability has been fixed. If you notice any unauthorized users in your WordPress dashboard, especially those with admin privileges, they should be deleted immediately.
Steps to Remove Unauthorized Users:
- Log in to your WordPress dashboard.
- Navigate to Users > All Users.
- Review the list of users, and delete any users you do not recognize or did not create.
- Be cautious not to delete legitimate users. If in doubt, verify their activity on the site.
2. Scan and Remove Malware
The next step is to scan your website for malware and infected files. You can use several powerful WordPress plugins and tools to automate this process. These tools will detect malware, vulnerabilities, and suspicious files, making it easier to identify areas that need attention.
Recommended Malware Scanning Tools:
- WordFence: WordFence provides a thorough security scanner that compares your WordPress core files, themes, and plugins against the official WordPress repository. It identifies malicious changes and offers the ability to automatically repair infected files.
- Sucuri Security: Sucuri is another excellent tool for scanning your WordPress site for malware, blacklisting, and file integrity issues. It also provides malware cleanup services if your site is deeply compromised.
- MalCare: MalCare specializes in cleaning hacked WordPress sites. It runs deep scans and allows you to remove malware from infected files without affecting site performance.
How to Run a Malware Scan:
- Install a Security Plugin: If you haven’t done so already, install a plugin like WordFence, Sucuri, or MalCare.
- Run a Full Scan: Use the plugin’s scanning feature to perform a complete scan of your WordPress files, themes, plugins, and databases.
- Identify Malicious Files: Once the scan is complete, the plugin will generate a report listing any infected files or suspicious activities. Review the results carefully.
3. Check and Replace Core WordPress Files
Sometimes, hackers modify your WordPress core files (e.g., wp-config.php, wp-includes/ functions.php, etc.) to gain control of your site. It’s crucial to restore your core files to their original state to ensure that no backdoors or malware remain.
Steps to Restore Core WordPress Files:
- Download a Fresh Copy of WordPress: Visit WordPress.org and download the latest version of WordPress.
- Extract and Replace Core Files:
- Using an FTP client (such as FileZilla or Cyberduck), connect to your server.
- Navigate to your WordPress installation directory (usually public_html).
- Replace the following directories with clean versions from the downloaded WordPress package:
- wp-admin
- wp-includes
Note: Be careful not to overwrite the wp-content folder, as this contains your themes, plugins, and uploads.
- Verify wp-config.php:
- Open the wp-config.php file on your server, and ensure that no unfamiliar or suspicious code has been added.
- If you find any malicious code, remove it or replace the wp-config.php file with a clean version, making sure to re-enter your database connection details.
4. Remove Malicious Code from Theme and Plugin Files
Hackers often target theme and plugin files because they are widely used and can contain vulnerabilities. You need to manually inspect your themes and plugins for malicious code. The most common files where malicious code is hidden include:
- functions.php
- header.php
- footer.php
- index.php
How to Identify and Remove Malicious Code:
- Check for Strange Code: Look for base64 encoding, long strings of unreadable text, or code added at the top or bottom of your theme’s files.
- Use a File Comparison Tool: If you have a clean backup or a fresh version of the theme, use a tool like diffchecker.com to compare the hacked files with the original ones. This will help you identify differences and isolate the malicious code.
- Reinstall Themes and Plugins:
- In many cases, the easiest way to clean a compromised theme or plugin is to reinstall it. Delete the theme or plugin and install a fresh copy from the official WordPress repository or the developer’s website.
- For premium themes, download the latest version from the developer and replace the infected files.
- Delete Unnecessary Plugins: Any outdated or unused plugins should be deleted. Outdated plugins are a common source of vulnerabilities, and removing them will reduce the attack surface for future hacks.
5. Inspect the Database for Malicious Content
Hackers sometimes inject malicious content into your WordPress database, often hiding it in posts, comments, or even WordPress options. This malicious content can include spam links, redirects, or scripts that load malware onto your site.
Steps to Inspect and Clean the Database:
- Access phpMyAdmin: Log into your hosting control panel (e.g., cPanel or Plesk) and open phpMyAdmin to access your WordPress database.
- Check the wp_options Table: The wp_options table contains many of WordPress’s core settings. Look for suspicious entries, especially under the siteurl, home, or active_plugins options. Delete any entries that don’t belong.
- Review Posts and Comments Tables: Inspect the wp_posts and wp_comments tables for spammy content or unusual code injections. If found, remove the malicious content.
- Run Database Cleanup Tools: Use plugins like WP-DBManager or WP-Optimize to clean and optimize your WordPress database. These plugins help remove unnecessary or corrupted database entries that may be related to the hack.
6. Check for Backdoors
A backdoor is a hidden script that allows hackers to regain access to your site, even after you’ve removed other malicious files. Backdoors can be hidden anywhere on your site, including in themes, plugins, or obscure directories.
How to Find and Remove Backdoors:
- Look for Unfamiliar Files: Using FTP/SFTP, navigate through your WordPress directories (especially wp-content, wp-includes, and wp-admin). Look for files with strange names or extensions, such as
.phpfiles in directories where they don’t belong. - Common Backdoor Locations:
- Uploads Directory: The wp-content/uploads folder is a common location for backdoors. Since this directory is used to store media, it is often overlooked.
- wp-includes: Check the wp-includes directory for files that don’t belong, as hackers may disguise backdoors here.
- Delete Backdoors: Once identified, delete any unfamiliar files immediately. If unsure, compare the contents of the suspicious file with a clean version from a fresh WordPress installation.
7. Remove Vulnerable Plugins and Themes
Some plugins or themes may be the root cause of your website’s hack, especially if they are outdated or poorly maintained. If a plugin or theme has been identified as vulnerable, it’s essential to remove it entirely and find a secure alternative.
How to Handle Vulnerable Plugins and Themes:
- Delete Outdated Plugins/Themes: Any plugins or themes that have not been updated in a long time should be considered insecure and deleted.
- Find Secure Replacements: If you rely on a specific plugin or theme, look for alternatives with better security records or premium options with more regular updates.
Final Steps in Cleaning the Hack
Once you’ve removed all infected files, cleaned your database, and ensured no backdoors remain, it’s time to take the final steps in securing your site:
- Reset All Passwords: Change all passwords, including WordPress admin accounts, database credentials, and FTP passwords, to strong, unique passwords. Use a password manager like LastPass or 1Password to generate and store them.
- Re-enable Your Website: Once you’re confident the hack has been fully cleaned up, disable maintenance mode and bring your website back online for visitors.
Cleaning up a hacked WordPress site takes diligence and care, but with a thorough approach, you can restore your site to its original state and secure it from future threats. Once the hack is cleaned up, move on to the next step: strengthening your website’s security to prevent future attacks.
Step 5: Reset Passwords and User Permissions
After cleaning up the hack and removing any malicious files or code, the next critical step is to reset all passwords and review user permissions on your WordPress website. When a site is compromised, hackers often steal login credentials, giving them access to your site’s backend, database, and other sensitive areas. Resetting passwords ensures that any compromised accounts are secured, while reviewing user permissions guarantees that only trusted users have the necessary access.
Resetting your passwords and updating user permissions can be the difference between securing your website from further attacks or leaving it vulnerable to the hacker’s return.
Why Resetting Passwords and Reviewing User Permissions Is Essential
- Compromised Credentials: Hackers often use stolen passwords to maintain control over your site, even after you’ve cleaned up malicious files. If you don’t reset passwords, there’s a strong possibility that hackers will be able to access your site again.
- Preventing Further Exploitation: Many hacks involve the creation of new admin users or the modification of existing accounts. If you don’t carefully review and reset permissions, malicious users may still be able to access sensitive areas of your site.
- Strengthening Site Security: Weak passwords and overly broad user permissions are among the most common reasons for security breaches. Resetting passwords and adjusting permissions will fortify your site against future attacks.
Steps to Reset Passwords and Review User Permissions
1. Reset All WordPress Admin Passwords
Your first priority should be resetting the passwords of all users with admin-level access to your WordPress site. These accounts are the primary target for hackers, as gaining control of an admin account gives them full control over your site.
How to Reset Admin Passwords:
- Step 1: Log in to WordPress Dashboard – If you’re able to log in, navigate to the Users section from your WordPress dashboard.
- Step 2: Select the Admin User – From the Users > All Users section, click on the admin user whose password you want to reset.
- Step 3: Reset the Password – Scroll down to the Account Management section and click the Set New Password button. Use a strong password, ideally generated by a password manager (e.g., LastPass, 1Password) to ensure it’s complex and unique.
- Step 4: Notify Admin Users – After resetting passwords, notify all users with admin access so they can log in with the new credentials.
If you’re locked out of your WordPress dashboard or if the hacker has changed the admin credentials, you can manually reset the password via phpMyAdmin.
How to Reset Passwords Using phpMyAdmin:
- Log in to Your Hosting Control Panel: Access your web hosting control panel (e.g., cPanel, Plesk) and open phpMyAdmin.
- Locate the wp_users Table: In phpMyAdmin, select your WordPress database and locate the wp_users table. This table stores all user information, including usernames and hashed passwords.
- Update the Password Field: Find the admin user you want to reset and click Edit. In the user_pass field, select MD5 from the function dropdown menu and enter the new password in the value field.
- Save Changes: Click Go to save the changes. The new password will now be set for the admin user.
2. Reset All WordPress User Passwords
It’s not enough to reset only admin passwords. Every user who has access to your WordPress site should have their password reset, particularly if they have higher-level permissions (e.g., editor, author, contributor). This is especially important if your site allows public user registration, as the hacker may have compromised other accounts as well.
Steps to Reset All User Passwords:
- Step 1: Use a Password Reset Plugin – If you have many users, manually resetting each password can be time-consuming. Use a plugin like WP Password Reset to reset all user passwords in bulk. This plugin allows you to send password reset emails to all users at once.
- Step 2: Require Password Reset Upon Next Login – Forcing all users to reset their passwords the next time they log in adds an extra layer of security. You can use plugins like Force Password Reset to implement this feature automatically.
- Step 3: Notify Users – Make sure to notify all users of the password reset process and provide them with instructions on how to update their credentials. Emphasize the importance of using strong passwords.
3. Review and Adjust User Permissions
After resetting passwords, it’s time to audit your user roles and permissions. WordPress has several predefined roles—Administrator, Editor, Author, Contributor, and Subscriber. Each role has a different level of access, and ensuring users have the correct permissions is crucial for your site’s security.
Steps to Review and Adjust Permissions:
- Step 1: Review the Current User List – Go to Users > All Users in your WordPress dashboard and review the list of users. Pay close attention to user roles and make sure that only trusted users have Administrator or Editor roles.
- Step 2: Remove Unnecessary Admin UsersIf there are multiple admin users on your site, reduce the number to a minimum. Only users who absolutely need full control of the site should have Administrator privileges. Remove any admin users you don’t recognize.
- Step 3: Change User Roles Where Appropriate – If you find users with roles that give them more permissions than they need, downgrade their roles to a more limited level. For example:
- Editors can create and publish content but do not need access to site settings.
- Authors can write and manage their own posts but should not have access to other users’ posts or site management features.
- Contributors can write content but cannot publish it.
To change a user’s role, click on the user’s name in the Users section and select the appropriate role from the Role dropdown menu.
- Step 4: Use a Plugin for Advanced Role Management – If you need more granular control over permissions, you can use a plugin like User Role Editor. This plugin allows you to create custom roles and assign specific permissions, making it easy to manage users’ access levels.
4. Enable Two-Factor Authentication (2FA)
Adding two-factor authentication (2FA) is one of the best ways to secure user accounts, especially those with administrative privileges. With 2FA enabled, users will need to provide a second form of authentication (such as a code sent to their phone) in addition to their password, making it much harder for hackers to gain access even if they have the password.
Steps to Implement Two-Factor Authentication:
- Step 1: Install a 2FA Plugin – Plugins like Two Factor Authentication, Google Authenticator, and WP 2FA allow you to add two-factor authentication to your WordPress login page.
- Step 2: Configure 2FA – After installing the plugin, navigate to the plugin’s settings and choose your preferred 2FA method. The most common methods are Google Authenticator, SMS, or email-based verification.
- Step 3: Force Admins to Use 2FA – You can require that all admin users enable 2FA for an added layer of security. Many 2FA plugins allow you to enforce this requirement for specific user roles.
5. Secure Database and FTP Credentials
Resetting your WordPress user passwords is essential, but don’t forget to reset other critical credentials like database and FTP/SFTP passwords. Hackers may have gained access to your server or database during the breach, so updating these credentials ensures that they can no longer access these areas.
How to Reset Database Passwords:
- Step 1: Log in to Your Hosting Control Panel: Access your hosting provider’s control panel and open the MySQL Databases section.
- Step 2: Change Database User Password: Select the user account associated with your WordPress database and update the password to a strong, secure one. Be sure to update the password in your wp-config.php file as well, so WordPress can continue connecting to the database.
How to Reset FTP/SFTP Passwords:
- Step 1: Log in to Your Hosting Control Panel: Navigate to the FTP Accounts section of your control panel.
- Step 2: Update FTP Passwords: Select the FTP account(s) used for managing your WordPress files and reset the passwords. Be sure to create a strong password for each account.
6. Limit Login Attempts
To prevent brute force attacks, where hackers repeatedly try to guess your login credentials, it’s important to limit login attempts on your WordPress site. By limiting the number of failed login attempts allowed, you can block hackers from continuously trying different passwords.
How to Limit Login Attempts:
- Step 1: Install a Plugin – Use a plugin like Limit Login Attempts Reloaded or Login Lockdown to automatically block users after a certain number of failed login attempts.
- Step 2: Configure Lockout Settings – Set the plugin to block users after three to five failed login attempts and configure it to notify you of any suspicious activity.
7. Log and Monitor User Activity
To enhance security, consider using a plugin that logs user activity on your WordPress site. This will help you monitor who is accessing the site, what changes they are making, and detect any suspicious activity.
Recommended Plugins for User Activity Logging:
- WP Activity Log: This plugin tracks user activity on your site and provides real-time notifications when certain events occur, such as new user creation, failed login attempts, or file modifications.
- Simple History: Simple History is another popular plugin that shows recent changes made to your WordPress site, including posts, pages, and settings.
By monitoring user activity, you can quickly identify any unauthorized actions and address security risks before they escalate.
Resetting passwords and reviewing user permissions are essential steps in securing your WordPress site after a hack. By following these steps, you can prevent hackers from regaining access and ensure that your site is protected moving forward. Once you’ve completed this step, your WordPress website will be significantly more secure, and you can confidently proceed to the next stage: securing your site against future attacks.
Step 6: Restore Your Website from Backup (Optional)
Restoring your WordPress website from a backup is one of the quickest and most reliable ways to recover from a hack, especially if the damage is extensive and cleaning up the infection manually proves difficult. This option allows you to revert your website to a previous version, hopefully one that is clean and free of malicious code.
In this step, we’ll walk through the process of restoring your website from a backup and the precautions you need to take to ensure that you’re restoring from a safe, uncompromised version of your site.
When to Restore from a Backup
Not all hacks are easy to clean up manually. You might want to restore your website from a backup if:
- The Hack Has Caused Extensive Damage: If the infection is widespread or you’re unable to pinpoint all the malicious files, restoring a backup can save time and reduce the risk of leaving hidden malware on your site.
- You Have a Recent, Clean Backup: This option is only viable if you have a recent backup of your site, made before the hack occurred. Restoring from an older backup may result in data loss, such as missing content, comments, or transactions.
- Manual Cleanup Fails: If manual attempts to clean the hack have been unsuccessful or you continue to experience issues, restoring a backup ensures that any remaining malware or vulnerabilities are removed.
Steps to Restore Your Website from Backup
The exact steps for restoring a backup will vary depending on how you originally backed up your site. Here, we’ll cover three common methods of restoring a WordPress website: using a backup plugin, restoring via your hosting provider, and manually restoring from FTP and database backups.
1. Restoring via a Backup Plugin
If you used a backup plugin to create regular backups of your site, restoring it is straightforward. Plugins like UpdraftPlus, BackupBuddy, and Duplicator offer easy-to-use restoration options.
How to Restore Using UpdraftPlus:
- Step 1: Log into Your WordPress Dashboard – Navigate to your WordPress dashboard and go to Settings > UpdraftPlus Backups.
- Step 2: Go to the Existing Backups Section – In the UpdraftPlus plugin, you’ll see a section titled Existing Backups. This is where your backup archives are stored, either locally or in a connected cloud storage service like Google Drive, Dropbox, or Amazon S3.
- Step 3: Choose the Backup to Restore – Select a backup version from before your site was hacked. Make sure to choose a version that you are confident is clean and secure.
- Step 4: Click Restore – Click the Restore button and select the components of the backup you want to restore (e.g., database, plugins, themes, uploads, or all files). Most of the time, you’ll want to restore everything.
- Step 5: Complete the Restoration Process – UpdraftPlus will retrieve the backup from your storage location and start the restoration process. Once completed, check your site to ensure it’s functioning as expected.
Restoring with BackupBuddy or Duplicator:
Both BackupBuddy and Duplicator follow a similar process to UpdraftPlus. You simply navigate to the plugin, select the backup you wish to restore, and follow the on-screen instructions to revert your site to its previous state.
2. Restoring a Backup via Your Hosting Provider
Many hosting providers offer automatic backups as part of their hosting plans, particularly if you’re using managed WordPress hosting services like WP Engine, SiteGround, or Bluehost. If you have backups stored on your server, restoring your site can often be done directly through your hosting control panel.
How to Restore Using cPanel (or Similar Hosting Control Panels):
- Step 1: Log into Your Hosting Control Panel – Log in to your hosting provider’s control panel (e.g., cPanel, Plesk, or your hosting provider’s proprietary dashboard).
- Step 2: Locate the Backup or Restore Option – In cPanel, go to the Files section and select Backup or Backup Wizard. Some hosting providers have a dedicated Restore section or offer one-click restoration options under Backup Management.
- Step 3: Select the Backup to Restore – Choose the backup that was created before your site was hacked. Most hosting providers keep daily, weekly, or monthly backups, so make sure to pick the most recent clean version.
- Step 4: Restore Your Files and Database – You can usually restore your entire site, including both the files and database. Some providers give you the option to restore only specific parts of your website, such as just the database or the wp-content directory. For a full recovery, you’ll want to restore both.
- Step 5: Verify Your Site’s Functionality – After the restoration process is complete, visit your site and the WordPress dashboard to ensure everything is functioning as expected and that the hack has been successfully removed.
3. Manual Restoration from FTP and Database Backup
If you backed up your WordPress site manually using FTP/SFTP and phpMyAdmin (or another database management tool), you can restore your website by uploading the backup files and database manually.
How to Restore Files via FTP:
- Step 1: Connect to Your Server via FTP/SFTP – Use an FTP client like FileZilla or Cyberduck to connect to your server. You’ll need your FTP credentials from your hosting provider.
- Step 2: Upload Backup Files – Locate the backup files you saved earlier (including wp-content, wp-admin, and wp-includes) and upload them to the root directory of your WordPress installation (usually public_html or www).
- Step 3: Overwrite Existing Files – When prompted, overwrite the existing files on your server with the backup files you’re uploading. This will revert your website files to their previous, clean state.
How to Restore the Database via phpMyAdmin:
- Step 1: Log into phpMyAdmin – Access phpMyAdmin through your hosting control panel.
- Step 2: Select the WordPress Database – Select the WordPress database that you want to restore. If you’re unsure which one it is, check the wp-config.php file in your WordPress installation, where the database name is specified.
- Step 3: Import the Backup File – Click on the Import tab and select the .sql file of your database backup. This will restore your database to its previous state.
- Step 4: Confirm the Import – Once the import is complete, check for any errors and ensure that the database tables have been restored correctly.
Things to Consider When Restoring from a Backup
- Ensure the Backup Is Clean: Before restoring a backup, ensure that the version you are restoring from is clean and not infected with any malware or malicious code. If the backup was taken after the hack occurred, you might end up restoring the infection along with the site.
- Backup Your Current Site First: Even though your current site may be hacked, it’s a good practice to take a backup of your hacked site before restoring the old version. This ensures that you can revert if needed or inspect the hacked files for future prevention.
- Loss of Recent Data: Restoring from a backup will likely cause you to lose any data (such as posts, comments, or e-commerce transactions) made after the backup date. Make sure to weigh the pros and cons of this loss, especially if the backup is several days or weeks old.
- Reapply Security Fixes: After restoring your site from a backup, remember to apply the security measures outlined in previous steps. This includes updating all plugins, themes, and WordPress core, resetting passwords, and strengthening site security to avoid getting hacked again.
Final Steps After Restoring from a Backup
Once your website has been successfully restored from a backup, take the following steps to ensure it stays secure and fully operational:
- Scan for Malware: Run a malware scan using a plugin like WordFence or Sucuri to verify that the restored site is clean.
- Update WordPress, Plugins, and Themes: Ensure that your WordPress core, themes, and plugins are up to date. Vulnerabilities in outdated software are one of the leading causes of hacks, so keeping everything updated is crucial.
- Strengthen Security: Implement additional security measures, such as installing a firewall, enabling two-factor authentication, and limiting login attempts to prevent future hacks.
- Monitor Your Site: Use a monitoring tool to track suspicious activity on your site. Tools like Sucuri and WordFence Premium offer real-time monitoring and will alert you if any unusual activity is detected.
Restoring your WordPress site from a backup is often the fastest and most reliable way to recover from a hack, especially when other cleanup methods are too complex or ineffective. By following the steps outlined above, you can quickly revert your site to a secure, pre-hack state. Once the site is restored, focus on tightening security to prevent future attacks and ensure that your site stays safe.
Step 7: Secure Your WordPress Website Against Future Hacks
After recovering your WordPress website from a hack, the next critical step is to fortify your website’s security to prevent future attacks. Hackers are constantly looking for vulnerabilities in websites, and without proper safeguards, your site could easily be compromised again. By implementing robust security practices, you can significantly reduce the risk of future breaches and ensure the long-term safety of your site.
This step outlines comprehensive measures to secure your WordPress website, including software updates, firewalls, password management, and backup strategies. By following these best practices, you can keep your website secure, protect sensitive data, and provide a safe experience for your visitors.
Why Securing Your WordPress Website is Crucial
- Prevent Future Attacks: Once a website has been hacked, it becomes a prime target for further attacks. Strengthening your website’s security ensures that hackers can’t exploit the same vulnerabilities again.
- Protect Sensitive Data: If your site handles user data, such as email addresses, payment information, or other personal details, protecting this data is essential to avoid legal issues and protect your users’ privacy.
- Maintain SEO Rankings: Security issues such as malware injections, spam links, or downtime can harm your website’s SEO performance. By keeping your site secure, you ensure that search engines like Google won’t penalize or blacklist your site, preserving your hard-earned rankings.
- Ensure Website Availability: Security breaches can cause significant downtime, which can damage your reputation and lead to lost revenue. Securing your website helps maintain high availability and ensures a smooth user experience.
Steps to Secure Your WordPress Website
1. Keep WordPress, Plugins, and Themes Updated
The most common way hackers infiltrate WordPress websites is through outdated software. Vulnerabilities in outdated versions of WordPress core, plugins, or themes can be easily exploited by attackers. Keeping everything up to date is one of the simplest and most effective ways to secure your site.
How to Keep WordPress Updated:
- Step 1: Enable Automatic Updates: For minor WordPress updates, the platform automatically applies them by default. However, for major updates, you need to manually update the core. Enable automatic updates for WordPress core by adding the following line to your wp-config.php file:
define('WP_AUTO_UPDATE_CORE', true);- Step 2: Regularly Update Plugins and Themes: Plugins and themes are often the weakest links when it comes to security. Ensure that all plugins and themes are regularly updated. You can set plugins to update automatically by adding the following code to your theme’s functions.php file:
add_filter('auto_update_plugin', '__return_true');Alternatively, you can use the Easy Updates Manager plugin to manage updates for WordPress core, plugins, and themes from one central location.
- Step 3: Remove Unused Plugins and Themes: Unused plugins and themes are potential security risks. Delete any plugins or themes that you’re not actively using to reduce the number of potential vulnerabilities on your site.
2. Install a WordPress Security Plugin
A security plugin can help automate many of the essential tasks required to secure your WordPress website, such as scanning for malware, blocking brute force attacks, and monitoring for suspicious activity. These plugins act as a firewall and provide real-time protection from various types of attacks.
Recommended Security Plugins:
1. WordFence Security
- WordFence is one of the most popular WordPress security plugins. It provides firewall protection, malware scanning, and real-time monitoring. It’s equipped with features like IP blocking, login security, and file integrity monitoring to help protect your website.
2. Sucuri Security
- Sucuri is a powerful tool that offers website firewalls, malware scanning, DDoS protection, and security hardening. Sucuri also provides website monitoring for vulnerabilities, blacklists, and other security issues.
3. iThemes Security
- iThemes Security strengthens your WordPress installation by fixing common vulnerabilities. It offers features like file change detection, two-factor authentication, brute force protection, and database backups.
Key Features to Enable in a Security Plugin:
- Firewall Protection: A firewall monitors incoming traffic and blocks malicious requests before they reach your server.
- Malware Scanning: Regularly scan your website files for malware, trojans, and other threats.
- Login Protection: Enable brute force protection to block multiple failed login attempts.
- File Integrity Monitoring: Get alerts if any core files are modified, which can indicate a hack.
3. Use Strong Passwords and Change Them Regularly
Weak passwords are an open invitation for hackers, especially in brute-force attacks, where attackers try thousands of password combinations until they find the correct one. Using strong, unique passwords for all user accounts is critical to keeping your site secure.
How to Enforce Strong Passwords:
- Step 1: Use a Password Manager: Use a password manager like LastPass, 1Password, or Bitwarden to generate and store strong, complex passwords. These tools can create random, highly secure passwords and store them for you, eliminating the need to remember them.
- Step 2: Use a Password Policy Plugin: Install the WP Password Policy Manager plugin to enforce strong password requirements for all users on your site. This plugin lets you set rules for password length, complexity, and expiration.
- Step 3: Change Passwords Regularly: Encourage all users, especially admins, to change their passwords every few months. Regularly changing passwords reduces the risk of compromised credentials being used.
4. Enable Two-Factor Authentication (2FA)
Two-factor authentication (2FA) adds an extra layer of security by requiring users to provide a second form of verification (usually a code sent to their phone) in addition to their password. This significantly reduces the chances of unauthorized access, even if an attacker manages to obtain a user’s password.
How to Set Up 2FA:
- Step 1: Install a 2FA Plugin: Use a plugin like Google Authenticator – Two Factor Authentication or WP 2FA to enable two-factor authentication for your WordPress login page.
- Step 2: Configure 2FA for Admin Users: Once the plugin is installed, require admin users and other high-level roles to set up two-factor authentication. These users will need to install an authenticator app on their phone (such as Google Authenticator) to generate the verification codes.
- Step 3: Enforce 2FA for All Users: You can choose to enforce 2FA for all users, including contributors and editors, to provide comprehensive protection. This is particularly important for websites with multiple users.
5. Limit Login Attempts and Block IPs
By default, WordPress allows users to make an unlimited number of login attempts. Limiting login attempts can prevent brute force attacks, where hackers try multiple password combinations to gain access to your site.
How to Limit Login Attempts:
- Step 1: Install a Login Limiting Plugin: Install the Limit Login Attempts Reloaded plugin to limit the number of failed login attempts allowed before a user is temporarily blocked.
- Step 2: Configure Lockout Settings: Set the plugin to block users after 3 to 5 failed login attempts. You can also configure it to lock accounts for a set period (e.g., 15 minutes) or until manually unlocked.
- Step 3: Monitor Login Attempts: Many security plugins (like WordFence and iThemes Security) offer real-time tracking of login attempts. You can review these logs and manually block suspicious IP addresses attempting multiple failed logins.
6. Implement HTTPS/SSL
An SSL certificate encrypts data transferred between your website and your visitors, protecting sensitive information like login credentials, payment details, and personal data. Implementing HTTPS is not only essential for security, but it’s also a ranking factor for Google, improving your SEO.
How to Set Up SSL:
- Step 1: Get an SSL Certificate: Most hosting providers offer free SSL certificates through Let’s Encrypt. Alternatively, you can purchase an SSL certificate from a trusted provider if your host doesn’t offer one.
- Step 2: Install the SSL Certificate: If you’re using a hosting provider that supports Let’s Encrypt, you can usually enable SSL with just a few clicks in your control panel. Once installed, make sure your WordPress site uses HTTPS for all pages.
- Step 3: Install a Plugin to Force HTTPS: Install the Really Simple SSL plugin to automatically detect your SSL certificate and force all traffic to your site to use HTTPS. This plugin also helps redirect old HTTP URLs to HTTPS, ensuring that your site is fully secure.
7. Backup Your Website Regularly
Regular backups are your ultimate safety net in case of a security breach. If your site is ever hacked or crashes, a recent backup allows you to restore your site quickly and with minimal data loss. Ensuring that backups are performed regularly and stored securely is critical for disaster recovery.
How to Set Up Regular Backups:
- Step 1: Use a Backup Plugin: Install a backup plugin like UpdraftPlus, BackupBuddy, or Duplicator to automate your backup process. These plugins allow you to schedule automatic backups of your site’s files and database.
- Step 2: Store Backups Offsite: Make sure your backups are stored in a secure offsite location, such as Google Drive, Dropbox, or Amazon S3. Storing backups on the same server as your website is risky because if the server is compromised, the backups may be affected too.
- Step 3: Schedule Automatic Backups: Schedule backups to occur automatically on a daily or weekly basis, depending on how often your site is updated. For high-traffic sites or e-commerce stores, daily backups are recommended.
8. Harden WordPress Security Settings
In addition to plugins and basic security measures, you can manually harden WordPress by tweaking a few settings. This step involves making changes to your WordPress installation to reduce vulnerabilities and limit access to sensitive areas.
Steps to Harden WordPress Security:
- Step 1: Disable File Editing: WordPress allows admins to edit PHP files directly from the dashboard. Disabling this feature prevents hackers from modifying your files if they gain access to the admin area. Add the following line to your wp-config.php file to disable file editing:
define('DISALLOW_FILE_EDIT', true);
- Step 2: Change Database Table Prefix: By default, WordPress uses the wp_ prefix for all database tables, making it easier for hackers to execute SQL injection attacks. Changing the table prefix to something more unique will make these attacks harder to carry out. If your site is already live, use a plugin like WP-DBManager to change the prefix without affecting the database.
- Step 3: Restrict wp-admin Access by IP:
<Files wp-login.php>
 order deny,allow
 Deny from all
 Allow from [Your IP Address]
 </Files>
Limit access to your wp-admin dashboard to only trusted IP addresses by adding this code to your .htaccess file:
Replace [Your IP Address] with your actual IP address. This ensures that only users from specified IP addresses can access the login page.
- Step 4: Disable XML-RPC: The XML-RPC feature is used for remote access and can be exploited by hackers for brute force attacks. If you’re not using this feature, disable it by adding this code to your .htaccess file:
<Files xmlrpc.php>
 order deny,allow
 Deny from all
 </Files>
Securing your WordPress website is a multi-step process that requires ongoing attention. By keeping your WordPress installation updated, using a security plugin, enforcing strong passwords, enabling two-factor authentication, and regularly backing up your site, you can drastically reduce the risk of future hacks. Implementing these steps will not only protect your website from security breaches but also ensure the safety of your users and the long-term success of your site.
Step 8: Monitor Your Website Regularly
Once your WordPress website is clean and secure, the work doesn’t stop there. Ongoing monitoring is critical to ensure that your site stays protected from future attacks. Regular monitoring allows you to quickly detect any unusual activity, prevent future hacks, and ensure that your website remains functional, secure, and optimized for your visitors.
Effective monitoring tools and strategies will help you catch problems before they become bigger issues, saving you time, money, and potential damage to your site’s reputation. This final step is all about establishing long-term security and performance practices to keep your website running smoothly.
Why Regular Monitoring is Important
- Early Detection of Threats: Monitoring your site allows you to catch security breaches or malicious activity as soon as they happen. The faster you detect an issue, the quicker you can respond before it causes significant damage.
- Prevent Future Hacks: By regularly scanning your website for vulnerabilities and malicious activity, you reduce the risk of future hacks. Regular monitoring helps ensure your plugins, themes, and WordPress core stay up to date and secure.
- SEO Protection: Hacks like spam injections and malware can hurt your SEO rankings. Search engines may flag your site as harmful if they detect malware or malicious links, leading to reduced traffic and credibility. Monitoring your site regularly prevents these issues from affecting your SEO performance.
- Maintain Site Performance: Monitoring your website’s performance ensures it remains fast and responsive. If your site becomes slow or suffers frequent downtime, visitors may leave, affecting both user experience and search engine rankings.
- Compliance with Security Best Practices: Regular monitoring helps you stay compliant with industry security standards and best practices, which is especially important if you handle sensitive user data (e.g., personal information or payment details).
How to Monitor Your WordPress Website Effectively
To monitor your website effectively, you’ll need a combination of security tools, performance tracking, and manual checks. Below are the key methods and tools to ensure your WordPress site remains safe, secure, and optimized.
1. Set Up Website Monitoring Tools
The best way to monitor your website is to use automated tools that continuously scan your site for vulnerabilities, security threats, and performance issues. These tools will alert you immediately if anything goes wrong, allowing you to take quick action.
Recommended Monitoring Tools:
1. WordFence Security
- WordFence is one of the most comprehensive security plugins for WordPress. It offers real-time monitoring for malware, suspicious login attempts, and changes to your WordPress files.
- Key features include:
- Malware scanning: Detects malicious files and potential vulnerabilities.
- Firewall: Blocks known malicious traffic.
- Login security: Monitors failed login attempts and suspicious activity.
- Alerts: Provides real-time notifications for security issues.
2. Sucuri Security
- Sucuri offers 24/7 website monitoring and protection against malware, DDoS attacks, and blacklisting. It scans your site for vulnerabilities, malware, and file integrity issues.
- Key features include:
- Security audits: Tracks changes to your website’s core files.
- Remote malware scanning: Detects malware and other security threats.
- DDoS protection: Shields your site from distributed denial-of-service attacks.
3. Jetpack Security
- Jetpack is a multifunctional plugin that includes security and performance monitoring features. It monitors for downtime, unauthorized logins, and malware.
- Key features include:
- Site uptime monitoring: Sends alerts if your site goes down.
- Brute-force attack protection: Blocks repeated failed login attempts.
- Malware scanning: Regular scans for viruses and other malicious software.
4. MalCare
- MalCare offers real-time malware detection and automatic malware removal. It monitors your WordPress site for security threats without affecting site performance.
- Key features include:
- Real-time malware scanning: Detects hidden malware and backdoors.
- Instant malware cleanup: Removes malware automatically when detected.
2. Monitor Website Uptime
Ensuring that your site is available to visitors at all times is essential. Downtime can hurt your credibility, frustrate users, and impact your SEO rankings. Uptime monitoring tools track your site’s availability and alert you if it goes offline.
Best Tools for Uptime Monitoring:
1. Uptime Robot
- Uptime Robot is a popular uptime monitoring tool that checks your site every five minutes to ensure it’s online. If your site goes down, you’ll receive an instant alert via email or SMS.
- Key features include:
- Downtime alerts: Receive instant notifications if your website is down.
- Performance tracking: Monitor the average response time of your website.
2. Pingdom
- Pingdom offers comprehensive monitoring for uptime, page speed, and user interactions. It provides detailed reports on your site’s performance and alerts you when it goes offline.
- Key features include:
- Real-time alerts: Get notifications when your website is down or experiencing performance issues.
- Detailed performance insights: Measure load times and pinpoint slow areas of your site.
3. Monitor Website Performance
Monitoring your website’s performance is crucial for delivering a great user experience and maintaining SEO rankings. A slow-loading website can lead to higher bounce rates and frustrated visitors.
Best Tools for Performance Monitoring:
1. Google PageSpeed Insights
- Google PageSpeed Insights is a free tool that analyzes your website’s performance and provides actionable recommendations to improve page load times.
- Key features include:
- Mobile and desktop performance scores: Get insights into how your site performs across different devices.
- Optimization suggestions: Receive detailed recommendations to improve site speed.
2. GTmetrix
- GTmetrix provides a comprehensive analysis of your site’s performance, offering detailed reports on page speed, load times, and recommendations for optimization.
- Key features include:
- Waterfall charts: Visualize your site’s loading process and identify bottlenecks.
- Performance scores: Receive a graded breakdown of your site’s speed.
3. WP Rocket (Performance Plugin)
- WP Rocket is a caching plugin that also monitors and improves site performance by reducing page load times and optimizing cache settings.
- Key features include:
- Page caching: Stores static copies of your pages for faster load times.
- Lazy loading: Improves performance by loading images only when users scroll down to them.
4. Monitor Traffic and User Behavior
Understanding how visitors interact with your website is essential for optimizing content and enhancing user experience. Traffic monitoring tools allow you to track visitor behavior, identify popular pages, and monitor for unusual traffic patterns, which could signal a security issue.
Best Tools for Traffic Monitoring:
1. Google Analytics
- Google Analytics is the most widely used tool for tracking visitor behavior and traffic on your website. It provides insights into where your visitors are coming from, how they navigate your site, and how long they stay.
- Key features include:
- Real-time traffic monitoring: See how many users are currently on your site.
- Traffic sources: Track where your visitors are coming from (e.g., organic search, social media, direct traffic).
- Behavior reports: Understand which pages are most visited and how users move through your site.
2. MonsterInsights
- MonsterInsights is a plugin that integrates Google Analytics directly into your WordPress dashboard. It provides an easy-to-understand overview of your traffic, conversions, and user behavior.
- Key features include:
- Real-time stats: View real-time traffic stats directly from your dashboard.
- E-commerce tracking: Monitor product performance, cart activity, and sales for WooCommerce sites.
5. Monitor for Vulnerabilities and Malware
Regularly scanning your site for vulnerabilities and malware is essential to catching potential issues before they escalate into full-blown hacks.
Best Tools for Vulnerability and Malware Monitoring:
1. WPScan
- WPScan is a powerful tool that scans your WordPress site for known vulnerabilities in plugins, themes, and the WordPress core. It checks for out-of-date software and alerts you to any security issues.
- Key features include:
- Vulnerability database: Access a comprehensive database of WordPress vulnerabilities.
- Scheduled scans: Set up automatic scans to check your site regularly for issues.
2. iThemes Security
- iThemes Security offers proactive monitoring for vulnerabilities, brute force attacks, and other security issues. It helps strengthen your site’s defenses by identifying weak points and offering protection suggestions.
- Key features include:
- File change detection: Receive alerts when files are modified.
- Database backups: Schedule regular database backups to protect your data.
6. Monitor Backups
Keeping regular backups of your website is a must for recovery after an attack or crash. However, simply setting up backups isn’t enough; you also need to monitor and test them to ensure they’re working correctly.
Best Tools for Backup Monitoring:
1. UpdraftPlus
- UpdraftPlus allows you to schedule automatic backups and store them in the cloud. You can monitor the status of each backup to ensure it completes successfully.
- Key features include:
- Automatic backups: Set and forget backups with automated scheduling.
- Backup logging: Review logs to verify backups are completed successfully.
2. BackupBuddy
- BackupBuddy not only automates backups but also allows you to monitor backup health and integrity. It keeps you informed of backup successes or failures.
- Key features include:
- Scheduled backups: Automate backups and receive alerts if something goes wrong.
- Restore testing: Easily test backup restorations in a staging environment.
7. Manual Checks for Site Security
In addition to using automated tools, it’s important to perform regular manual checks on your website to ensure everything is functioning as expected. These checks should include:
- Reviewing user accounts: Regularly review the Users section of your WordPress dashboard for unfamiliar or suspicious accounts. If you notice any unauthorized users with admin privileges, remove them immediately.
- Checking for plugin and theme updates: Outdated plugins and themes are one of the most common vulnerabilities exploited by hackers. Regularly check your plugins and themes for updates and install them as soon as possible.
- Reviewing logs: If you’re using a security plugin like WordFence or Sucuri, regularly review the logs for any suspicious activity, such as repeated failed login attempts or unexpected file changes.
Regularly monitoring your WordPress website is essential for maintaining its security, performance, and overall health. By using a combination of security tools, performance monitoring, and manual checks, you can catch potential issues early, prevent future hacks, and ensure that your website remains functional and optimized for your visitors. Once your monitoring systems are in place, you can rest easier knowing that your website is being constantly watched and protected from threats.
Conclusion: Fixing a Hacked WordPress Site Requires Diligence
Getting your website hacked is a stressful experience, but with the right tools and processes, you can recover your site and come out stronger than before. From detecting the hack to securing your website against future attacks, each step plays a crucial role in maintaining a healthy and safe online presence.
Don’t wait until it’s too late—implement these strategies today to ensure that your website remains secure and operational for years to come.
FAQs: How to Fix a Hacked WordPress Website
1. What is the first thing I should do if my WordPress website is hacked?
The first step is to take your website offline and back up your data. This prevents further damage and ensures you have a secure copy of your website before cleaning the hack.
2. Can I fix my WordPress website hack by myself?
Yes, if you follow the steps outlined above, you can clean up your hacked site. However, if the damage is extensive, you may want to consult a professional WordPress security expert.
3. How do I find out if my website has been hacked?
Look for signs like unauthorized user accounts, changes to your content, spammy links, or malware alerts from tools like Google Search Console, WordFence, or Sucuri.
4. What plugins can help me secure my WordPress website?
WordFence, Sucuri, iThemes Security, and All In One WP Security & Firewall are great options to secure your WordPress site.
5. Can I restore my website from a backup after a hack?
Yes, if you have a clean backup that was made before the hack occurred, you can restore your site from that backup.
6. Will Google penalize my website if it gets hacked?
Yes, if Google detects malware or spam on your site, it may remove it from search results or display a warning to users.
7. How can I prevent my website from being hacked again?
Ensure all software is updated, use strong passwords, limit login attempts, enable two-factor authentication, and regularly monitor your site for suspicious activity.
8. What is the best way to monitor my WordPress website?
Use tools like Google Search Console, Uptime Robot, and WordFence Premium for ongoing monitoring and protection against hacks.